Getting Started
This section provides guidance on the initial steps to start working with the SidecarT board. If you are a developer or maker it includes prerequisites, board assembly instructions, setup and configuration. Developers and Makers can also ensure a smooth start to their journey with the SidecarT board by following the procedures outlined in this and coming sections.
Table of contents
Prerequisites for All Users
Skills
To begin with the SidecarT board, all users are required to have a minimum experience with computers. Power on, power off, and basic knowledge of how to use a computer is enough to get started. However, it’s desirable for users to be familiar with the Atari ST computer series, its hardware, and software.
Hardware
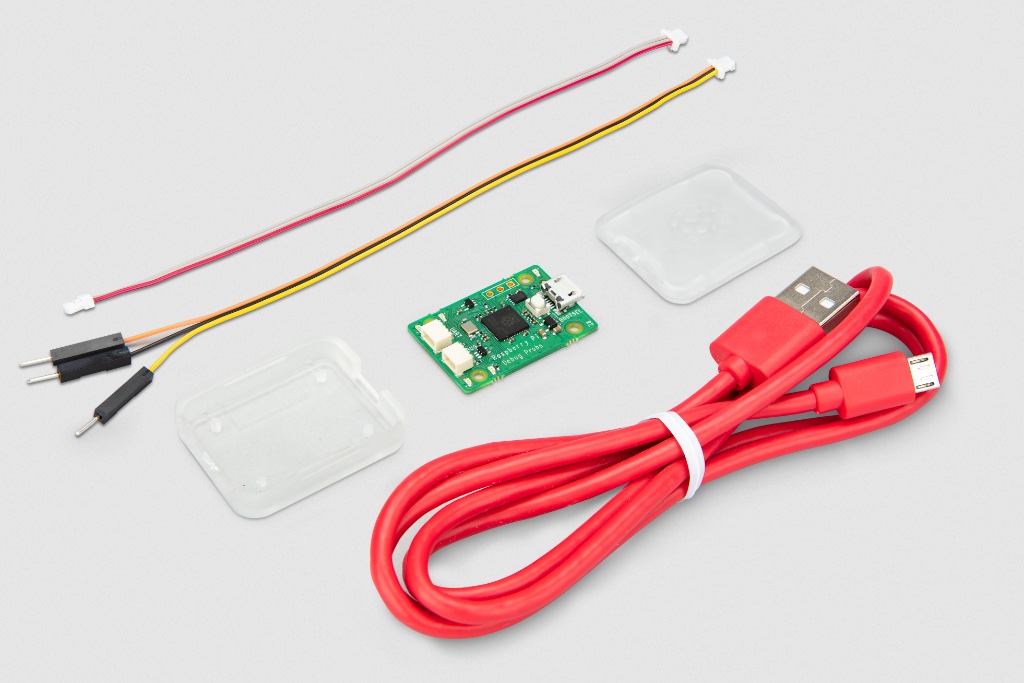
Users will need the following hardware:
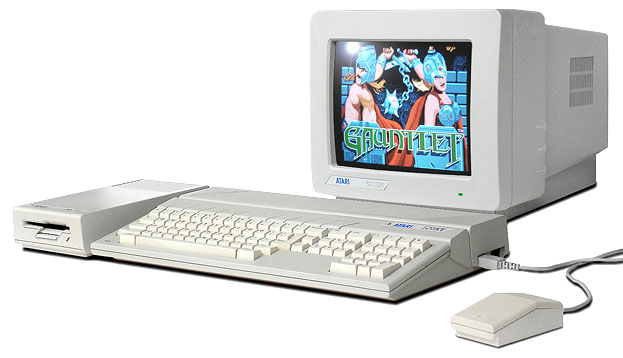
- An Atari ST computer series: ST, STE, or MegaST or MegaSTE. It’s worth noting that the SidecarT board can emulate a physical floppy drive, so an Atari ST without a (or a broken) floppy drive can still be used with the SidecarT board. The SidecarT board is also compatible with TOS versions ranging from 1.00 to 2.06, almost every single ST and STE series compute sold.
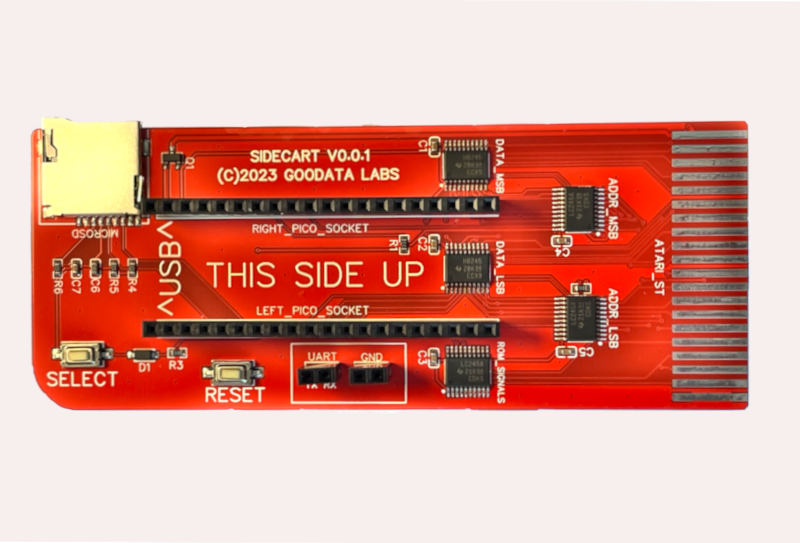
- A SidecarT board
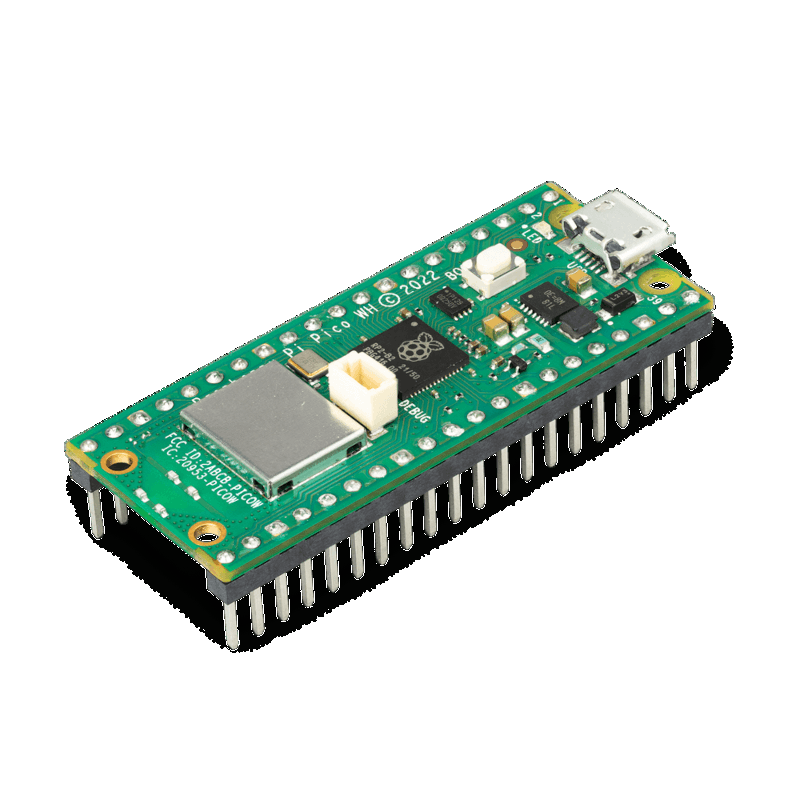
- A Raspberry Pi Pico WH (Reference SC0919), which already comes with the necessary 40-pin connectors to attach to the SidecarT’s motherboard, or a Raspberry Pi Pico W (Reference SC0918) and procure two 20-pin connectors, then solder them to the board yourself. Here’s a link to a manufacturer for reference.
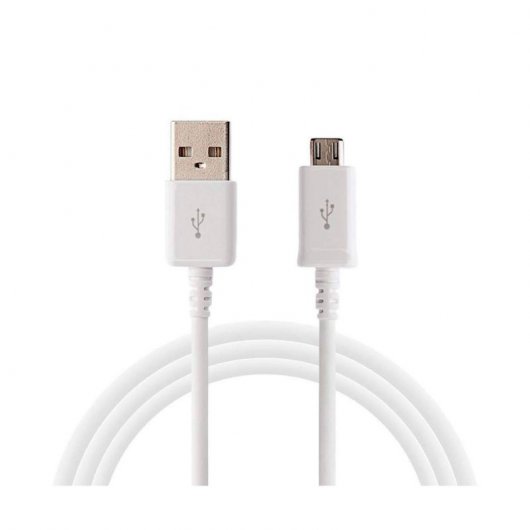
- A USB A to micro USB data cable to install and update the SidecarT firmware on the Raspberry Pi Pico W. It’s important to note the emphasis on a “data” cable - a simple charging cable won’t suffice.
- (Optional) A microSD card formatted as FAT16 or exFAT.
Initial Setup and Configuration
The Initial Setup and Configuration is a multi-step process aimed at preparing the SidecarT board for use with the Atari ST, STE, or Mega computer. Here’s a summarized version of the detailed instructions available here.
It does not matter if you are an experience developer or a novice enthusiast; the above steps are mandatory to get started with the SidecarT board. Please don’t skip any of the steps, as it may lead to unexpected results.
Prerequisites for Developers and Makers
Skills
To begin with the SidecarT board, developers are required to have a minimum experience with C. However, it’s desirable for developers to be proficient in C, 68000 Assembler, Microcontroller development, and have a deep understanding of Atari ST peculiarities. To contribute effectively to the SidecarT project, having a foundation in certain skills will be beneficial. Here’s a breakdown:
C Programming: Essential for software development and firmware writing. Ensure you have a grasp on data structures, memory management, and algorithm development within C.
68000 Assembler: Crucial for understanding and working with low-level part of the firmware for Atari ST.
Microcontroller Development: Familiarity with microcontrollers, especially with Raspberry Pi Pico’s microcontroller RP2040, is vital. You should understand how to write, test, and debug firmware, manage I/O operations, and deal with real-time constraints.
Atari ST Knowledge: A robust understanding of Atari ST hardware and software, its system call and memory management will significantly boost your contribution efforts.
Version Control/Git: Ability to effectively use git, manage branches, resolve merge conflicts, and understand the workflow to keep the codebase stable and collaborative.
Testing and Debugging: Practical know-how on debugging, writing test cases, and validating hardware/software integration ensures a robust build.
Visual Studio Code Expertise: Familiarity with using Visual Studio Code, configuring workspaces, managing extensions, and utilizing its debugging capabilities will facilitate a smoother development experience.
GCC: Understanding how to utilize GCC for compiling C and C++ code, managing dependencies, and debugging is vital for software development in this project.
VASM: Knowledge of using the VASM assembler, its syntax, and how to compile assembly code, particularly for the 68000, will enable efficient low-level development.
Makefile: Know-how on writing and managing Makefiles to automate build processes, manage dependencies, and optimize the development workflow.
Integration with GDB: Skills in using GDB for debugging software, setting breakpoints, inspecting variables, and analyzing program flow, especially in conjunction with Visual Studio Code, are essential for troubleshooting and ensuring software stability.
And if you want to contribute to the harware, skills in reading schematics, understanding electronic components, and practical skills like soldering will facilitate working with the hardware aspects of SidecarT.
Even if you’re not an expert in all these areas, your contribution is still valuable. Engage, learn, and grow with the SidecarT community!
Hardware
Additionally, developers need the following hardware:
An Atari ST computer series: ST, STE, or Mega (See above)
A SidecarT board (See above)
A Raspberry Pi Pico WH board to connect it to the SidecarT board. The
Wstands for Wireless and theHstands for Header. TheHversion comes with the header pins already soldered to the board and a JST debugger connector needed to connect the Raspberry Pi Debug Board.
- A Raspberry Pi Debug board or an equivalent debug board to connect it to the SidecarT board
- A Windows PC, Linux or a Mac with a USB port to connect to the Raspberry Pi Debug board and the Raspberry Pi Pico W board to program it
These prerequisites are considered as a minimum baseline. Being well-versed with the aforementioned technologies and having the required hardware will ensure a seamless initial experience with the SidecarT board.
Board Assembly
Anyone with the requisite skills can opt to build their own SidecarT board. The schematics needed to assemble the board can be found in the Github repository. It provides detailed blueprints to guide users through the assembly process.
However, it is worth noting that acquiring the board through our online shop is likely to be both cheaper and more convenient, given the complexities involved in assembling the board.
Assembling the board independently can be a rewarding and enriching learning experience for those who are interested in a hands-on approach to understanding the intricate workings of the SidecarT board. Obviously, it is not recommended for those who are new to hardware development.